


How do you get rid of a textured ceiling?
How to get rid of a textured ceiling |
||||
|
|
||||
 |
Although very popular in the 1950s, Stucco ceilings, sometimes called, “Popcorn” or “acoustic ceilings”, are now less commonly seen in homes.
Artex, different to Stucco, is also a popular textured ceiling covering found in homes. |
|||
 |
||||
 |
To remove a textured ceiling, you will need:
|
|||
 |
Removing a textured ceiling is not particularly difficult, but it can be unpleasant.
Make sure you’re wearing protective clothing as the paint on the ceiling will fall onto you as you scrape. |
|||
 |
Step 1 – Prepare roomClear the room of all contents, including any hanging electrical fixtures. Turn off the room’s electric supply at the fuse box. |
|||
 |
Step 2 – Protect walls and floorCover the floor with plastic drop-cloths. Also protect the wall by hanging drop-cloths using painters’ tape positioned about 5mm below the ceiling. |
|||
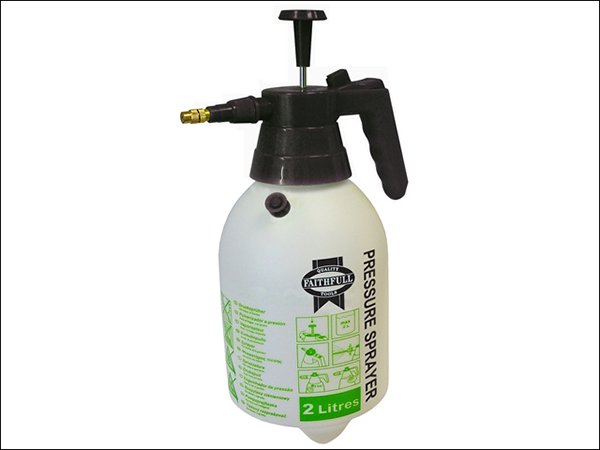 |
Step 3 – Soak ceilingSoften the texture with a light water spray. Then wait a couple of minutes for the water to soak into the ceiling. |
|||
 |
Step 4 – Use scraperScrape the texture away from you to remove from the ceiling using the scraper. |
|||
 |
Step 5 – Sand downUse a sanding pole with 100-grit sandpaper to remove excess dust and smooth the surface of the ceiling. |
|||
 |
Step 6 – Clear up messFold up the plastic sheeting, collecting the remains of the textured ceiling and then throw it all away. |
|||
